
This is the first year I will be doing an advent calendar with the boys. Our first December with children, we were in a really strange place in our lives, having just moved to a new town with a newborn. We were living in someone’s (very nice) basement and were struggling to make it feel like home. The next year, I was very pregnant (and very tired) with our second son and could not imagine adding another thing to our routine. This year? I’m ready.
 I didn’t want to buy an advent calendar for several reasons: I’m cheap, I don’t love the options out there (though I didn’t do much looking on Etsy…), and I really wanted it to be customized for our family. Many of the advent calendars in stores are great for a 9 year old but won’t work for my toddler and preschooler.
I did some searching on Pinterest and did find some great ideas. My friend Rachel (you’ll read more about Rachel and our little “Craft Corner” later) told me about one she saw where you cover a muffin tin with Christmas wrapping paper and let the kids poke through a hole each day and pull out a surprise each day. I liked the idea, but it seemed a little messy, like one wrong rip and you’ve messed up the whole thing. Then I saw several other muffin tin versions, but ya’ll? They looked HARD to make. I figured there had to be an easier way.
There is, and this is where I share it with you…
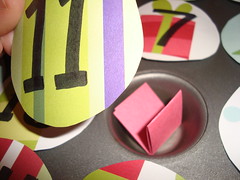
The Project: A Muffin Tin Advent Calendar where each day you remove that day’s number/date and pull out a strip of paper with a special holiday activity to complete that day.
Supplies Needed:
- 1 metal mini-muffin tin with 24 cups. Hopefully you already have one and aren’t planning to use it for the next 24+ days.
- Several sheets of scrapbooking paper or other pretty paper/cardstock. The more Christmasy, the better!
- Magnet sheets or rolls. I used the rolled-up kind with adhesive on one side, but if you just have some spare magnet stuffs lying around, you could make that work.
- A Sharpie or something else to make your numbers…You might get fancier than I did.
- Paper and pen for your advent activity strips.
1. Make a template for your circles to cover each muffin tin.
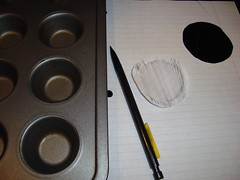
2. Cut out 24 circles from your scrapbooking or other pretty paper.

3. Arrange your circles on the muffin tin the way you want them to look on the finished product.
If you want some kind of pattern, now is the time to figure that out.
4. Put your circles in a stack in order and number them 1-24 using your Sharpie.
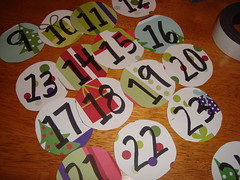
5. Cut your magnet pieces for each circle.
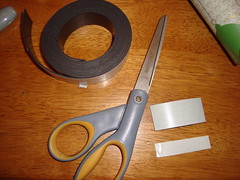
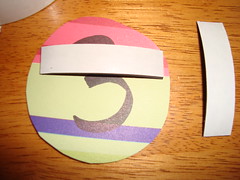
6. Affix magnet strip to circle and repeat until completed.

7. Write out activities for advent and place them in the muffin cup that corresponds with the day you will do it.

This is where you’ll need to think a bit. What special things will you experience with your kids before Christmas Day? What do you want to do or see? If there are certain days that will work best for certain activities, make sure you put that strip in that day’s hole. The nice thing about this style of advent calendar is that if your schedule changes, you can move the activities around! For example, I know we’re going to be out of town for several days in the middle of the month, visiting my husband’s family. I’ll be putting in activities that we will be able to do while we are there. Need some ideas? Check out this list!






Speak Your Mind